

Formatting Isn’t Optional—It’s Your Book’s First Impression
This post contains affiliate links, which means AmericanWritersGroup.com may earn a commission if you purchase through our links. That comes at no extra cost to you and helps us continue offering free tools, templates, and support.
Formatting is one of the most underestimated steps in self-publishing—until it goes wrong. A misplaced margin, awkward spacing, or a jumbled table of contents can instantly make your book look unprofessional. Worse? It could get rejected by Kindle Direct Publishing (KDP), IngramSpark, or a print-on-demand platform.
We once worked with a children’s book author who spent 20+ hours trying to format her full-color picture book in Microsoft Word. The file kept glitching, the images misaligned with every new version, and the PDF wouldn’t export cleanly. In the end, she hired a Fiverr freelancer who fixed it in under 48 hours. Lesson learned.
Whether you’re publishing a novel, a nonfiction guide, a workbook, or a fully illustrated children’s book, getting your formatting right is non-negotiable. But here’s the good news: you don’t have to do it all yourself.
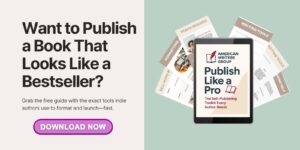
Want to skip the tech headaches?
Our favorite formatting tools, service recommendations, and a printable pre-print checklist are included.

Different Genres = Different Formatting Needs
Not all books are created equal. Formatting a 40-page children’s book with full-bleed images is nothing like laying out a 250-page thriller or a simple ebook.
If you’re working with:
- Full-page illustrations or color spreads
- Poetry or unusual line spacing
- Workbooks with fill-in-the-blank sections
- Sidebars, pull quotes, or footnotes
… you’ll want to think carefully about your layout choices from the beginning.
👉 Jump to Children’s Book Printing Guide
👉 Or keep reading for general formatting advice for most genres.
Step 1: Hire a Book Formatting Professional (Recommended for Most Authors)
If you want your book to look polished and meet publishing platform standards without pulling your hair out, hiring a formatting expert is the way to go.
This is especially smart if:
- Your book includes complex design elements
- You need both print and eBook formats
- You’re short on time and patience
Where to find expert help:
- Fiverr — Affordable, fast, and tons of vetted pros with KDP experience
- Upwork — Ideal if you’re building a team or need ongoing help
- Text Royal — Combine formatting with content cleanup and editing support
✅ Pro tip: Ask to see samples of past formatting work, especially for your genre. Make sure they understand trim size, margins, bleed, and ebook reflowing.

Step 2: Use Book Formatting Software (If You’re a DIY Type or Want Control)
Do you prefer to do things yourself? Book formatting software has come a long way. If you enjoy figuring out tools and have a bit of time, you can create a professional layout without starting from scratch.
🛠 Comparison Table: Book Formatting Tools
| Software | Best For | Price | Platform | Good For Print? |
|---|---|---|---|---|
| Vellum | Beautiful layouts, fast workflow | $$ | Mac only | ✅ Yes |
| Atticus | Cross-platform alternative to Vellum | $$ | Mac + PC | ✅ Yes |
| Canva | Workbooks, journals, PDFs | Free–$ | All | ✅ Yes |
| Draft2Digital | Free online ebook formatting | Free | All | ❌ No (ebook only) |
| Google Docs | Bare bones manuscripts | Free | All | ⚠️ Sort of |
| Kindle Create | Quick and free Kindle formatting | Free | PC + Mac | ⚠️ Basic only |
Use Grammarly to clean up your manuscript before layout. Then upload your clean text to your formatting software of choice. Want to design your workbook pages or fixed-layout spreads? Canva is a solid option with easy PDF exports.

Step 3: Free Tools That Get the Job Done (Bare Bones, but Functional)
If you’re bootstrapping your book launch or just testing the waters, there are some solid free options to help you format a clean, readable file.
- Kindle Create – Amazon’s own tool for Kindle books. Drag-and-drop simplicity, built-in styles, and table of contents generation.
- Google Docs – Use styles (heading, normal text), insert page breaks, and export to PDF. It’s basic, but it works
These tools are perfect for:
- Manuscript-style novels or memoirs
- First-time authors on a $0 budget
- Early drafts for review copies
Just know the limitations:
- Limited control over design
- Not ideal for print formatting with complex layouts
- Not great for visual or multimedia-heavy content
If you do use a free tool, always preview your file in Kindle Previewer or a print-ready PDF viewer to check for spacing issues.

Special Section: Formatting Children’s Books, Workbooks, and Visual Layouts
Formatting picture books and workbooks involves a whole different set of requirements. You’ll need to understand:
- Bleed: Extending artwork to the edge of the page
- Spine width: Especially for hardcover or thicker books
- Color printing: Make sure you’re designing in CMYK, not RGB
- Fixed layout: Where text and images stay locked in place
This is where professional help can save you hours of headaches.
Recommended Tools:
- Canva – Easily lay out fixed pages for kids’ books or workbooks
- Vellum – Ideal for balancing images and text in clean, simple layouts
Need a deep dive? Head over to our Children’s Book Printing Services page.

Step 4: Add Front Matter, Back Matter & Legal Pages
Your content may be king, but your book also needs structure and compliance.
Standard front and back matter includes:
- Title page and copyright page
- Dedication and table of contents
- Acknowledgments or author’s note
- “About the Author” bio
- Email list sign-up or link to your website
If you’re self-publishing nonfiction or activity books, you may also need:
- Disclaimers and usage rights
- Permission credits (for quotes, images, etc.)
Recommended tools and services:
- Mailerlite or AWeber – Create a freebie opt-in and link to it from your back matter (both have a free plan to start)
- Termly – Privacy policies, disclaimers, and terms of use
- The Contract Shop – Plug-and-play legal templates designed for creatives
➡️ For bios, intros, and acknowledgments help, see our guide on Biography Writing Services.

Step 5: Final File Prep & Upload
You’re almost ready to hit publish. Here’s what to double-check before uploading your files:
✅ Fonts are embedded in your print PDF
✅ Trim size and margins match your POD platform
✅ Bleed is set correctly for full-page illustrations
✅ TOC links work in EPUB files
✅ File exports are clean (no weird spacing or missing text)
✅ Your metadata (title, subtitle, author name) is consistent across files
Recommended Tools:
- Kindle Previewer – Simulate how your ebook will look across devices
- Dropbox – Store and share your files with printers or collaborators
- Otter.ai – Generate transcripts or extra content for your back matter or bonuses
- PublishDrive or Draft2Digital – Distribute your formatted book to stores worldwide
✅ Final Pre-Printing Checklist (Downloadable PDF)
Before you upload your book to KDP, IngramSpark, or your website store, make sure you’ve:
- Formatted for your chosen trim size and platform
- Included all required front and back matter
- Added bleed and spine width (for print books)
- Reviewed the file in Kindle Previewer or print simulator
- Embedded fonts and linked table of contents (where needed)
- Uploaded your cover file to match your interior page count
- Included a CTA in the back matter to grow your email list
👉 Download your free checklist now inside the “Publish Like a Pro” Toolkit
Conclusion: Get Help or Get Tools—Just Don’t Skip This Step
Whether you hire a pro, use formatting software, or go the free route, the goal is the same: to make your book as clean, readable, and professional-looking as possible.
Your readers deserve it. Your story deserves it. And you don’t have to figure it all out alone.
🚀 Ready to go from manuscript to publish-ready?
- Learn about Author Website Design
- Or get started with our Free Author Toolkit
You’ve got this. And we’ve got your back.
Some of the links in this post are affiliate links, which means if you choose to make a purchase, we may earn a small commission. This helps support our mission to provide free, practical tools and guides for self-published authors—thank you for your support!